
How to Use Wondershare Filmora X Video Editor On Windows?
Over the past few years, Wondershare Filmora has emerged as one of the best video editors for beginners. Almost every person who wants to start off with video content creation but has no knowledge of professional softwares like Adobe Premiere Pro or Sony Vegas prefers Wondershare Filmora X.
That’s because of the simplicity of the software, everything is right in front of you as soon as you launch Filmora X. However, those who haven’t tried the software yet, shouldn’t stop reading this article as we will be writing down a quick guide on how to use Wondershare Filmora X Video editor on Windows.
So without waiting further, let’s straight away jump into the list of features, followed by the how-to guide.
What is Wondershare Filmora X?
Currently, Wondershare Filmora provides several different video editing solutions for users with different video editing skills.
Filmora X video editor is basically for beginners who don’t want a complicated interface and advanced feature-loaded software for editing videos. Filmora X is ideal for those who want to edit videos for uploading on their channel on regular basis, making it exciting and fun to watch.
Whereas Filmora Pro is a powerful editing software with advanced features, and it is a totally different video editor designed for those who want full control over each clip, effect, transition and audio in the video.
Both of the video editors are totally free to use, however, while exporting the video, there will be a watermark on it.
Let’s now find out some exciting features of the Filmora X video editor.
Features offered by Filmora X Video Editor
Animation Keyframing
This feature of the Filmora x video editor allows you to create custom animations in a video. This gives full control over animation, its placement, movement, and various other parameters.

Motion tracking
The motion tracking feature of Filmora X allows you to analyze the motions in the video and apply them to another clip combined over the video. This feature is a must-have feature even in basic video editing software.
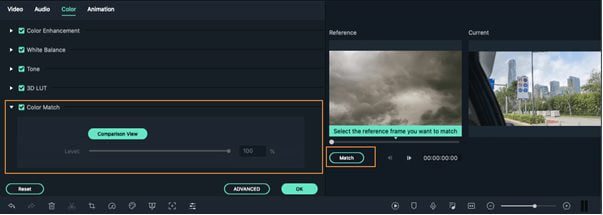
Color match
Sometimes, we may not be satisfied with the overall color quality of the video. With Filmora X, you can color match the clips simultaneously, and make you videos more enhanced.
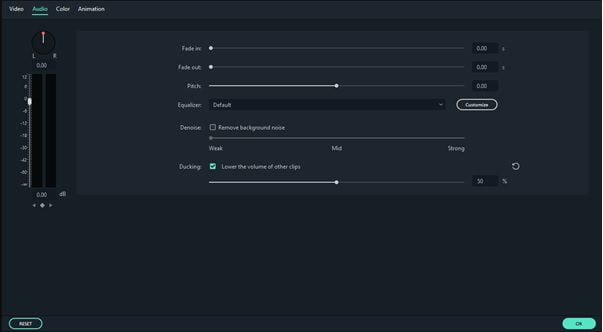
Audio ducking
Most of the vloggers often talk in between their videos and have background music playing at the same time. To make sure your viewers are able to hear you, the audio ducking feature can be used to reduce the volume of the music on certain time frames.
Huge library of Effects & Transitions
With FIlmora X, you will never run out of amazing effects and transitions anymore. You don’t have to use the same old transitions on every video anymore, choose from the library of effects and transitions that fits well with your videos.
Right songs for your videos
Filmora X has a huge library of background music for every type of video, whether it is a moto vlog, instructional video, gameplay, or a comedy video. The fun part is that all of these tracks are free to use, no need to worry about copyrights anymore.
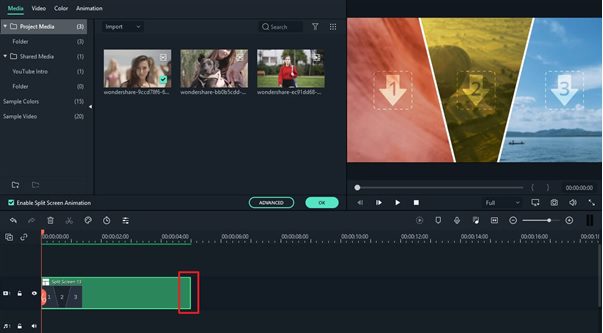
Split screen
The split-screen feature can be used in various ways, and with Filmora X, you can play around with the Split-screen feature and add extra fun to your videos.
Green screen
The green screen feature helps in changing the background of the video easily. If you run a news channel or a commentary channel, you can easily replace the green background with something else.
How to Use Wondershare Filmora X Video Editor on Windows?
Wondershare Filmora X is easy to use, however, some of you might have not used it before, so it is recommended to go through this quick how-to guide before you get started.
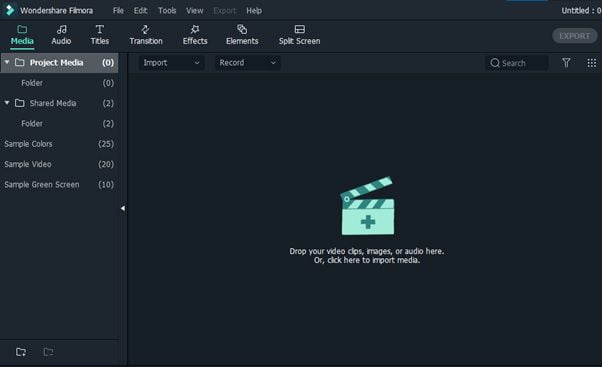
- Launch Filmora X on your Windows PC and create a new project. Choose a 16:9 aspect ratio if you want to edit videos for the landscape screen.
- Now drag and drop the video footage, images, audio onto the import window, or just click on the import window and import files from a specific folder.
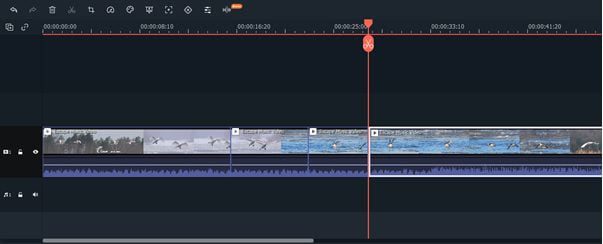
- Once done, drag the required files on the timeline.

- Using the scroll bar you can scroll to different time frames of the video footage and add a cut wherever required.
- Now click on transition, and choose from the list of transitions for adding them to the parts where you cut the video. This will hide the unwanted black screen, or can also be used to transit between one footage to another.
- Drag and drop the transition on the joints of two video clips.
Remember: You can only add transitions in the beginning or at the end if there are no cuts in between the video. For adding transitions in between a video clip, you’ll first have to add a cut and then place the transition.

- Now click on the text in the toolbar menu, and choose a text style, drag, and drop it at the beginning of the video.
- Once done, double click on the text, and add a suitable title for the video. Click on the advanced button and explore the additional features of text styles.

- Adjust the placement of the text by using the mouse on the preview screen.
- You can play around with other features like elements, overlays, and split-screen as well.
- Add music by clicking on the audio feature in the toolbar. Just drag and drop it on the timeline and cut the unwanted parts.
- Once you are done editing the video, hit Ctrl+S to save the project.
- Now to export the project, click on the export button and choose the desired video format. I’d recommend you choose the “device” option if you want to export different resolutions for different types of devices.
- That’s it. By the end of this guide, you have edited your first video in Filmora X.
Wrapping Up
Filmora X is a feature-packed video editing software that is easy to use. There’s a lot to explore in Filmora X. In this article, we thoroughly discussed the features offered and a quick guide on how to use Filmora X on Windows.